
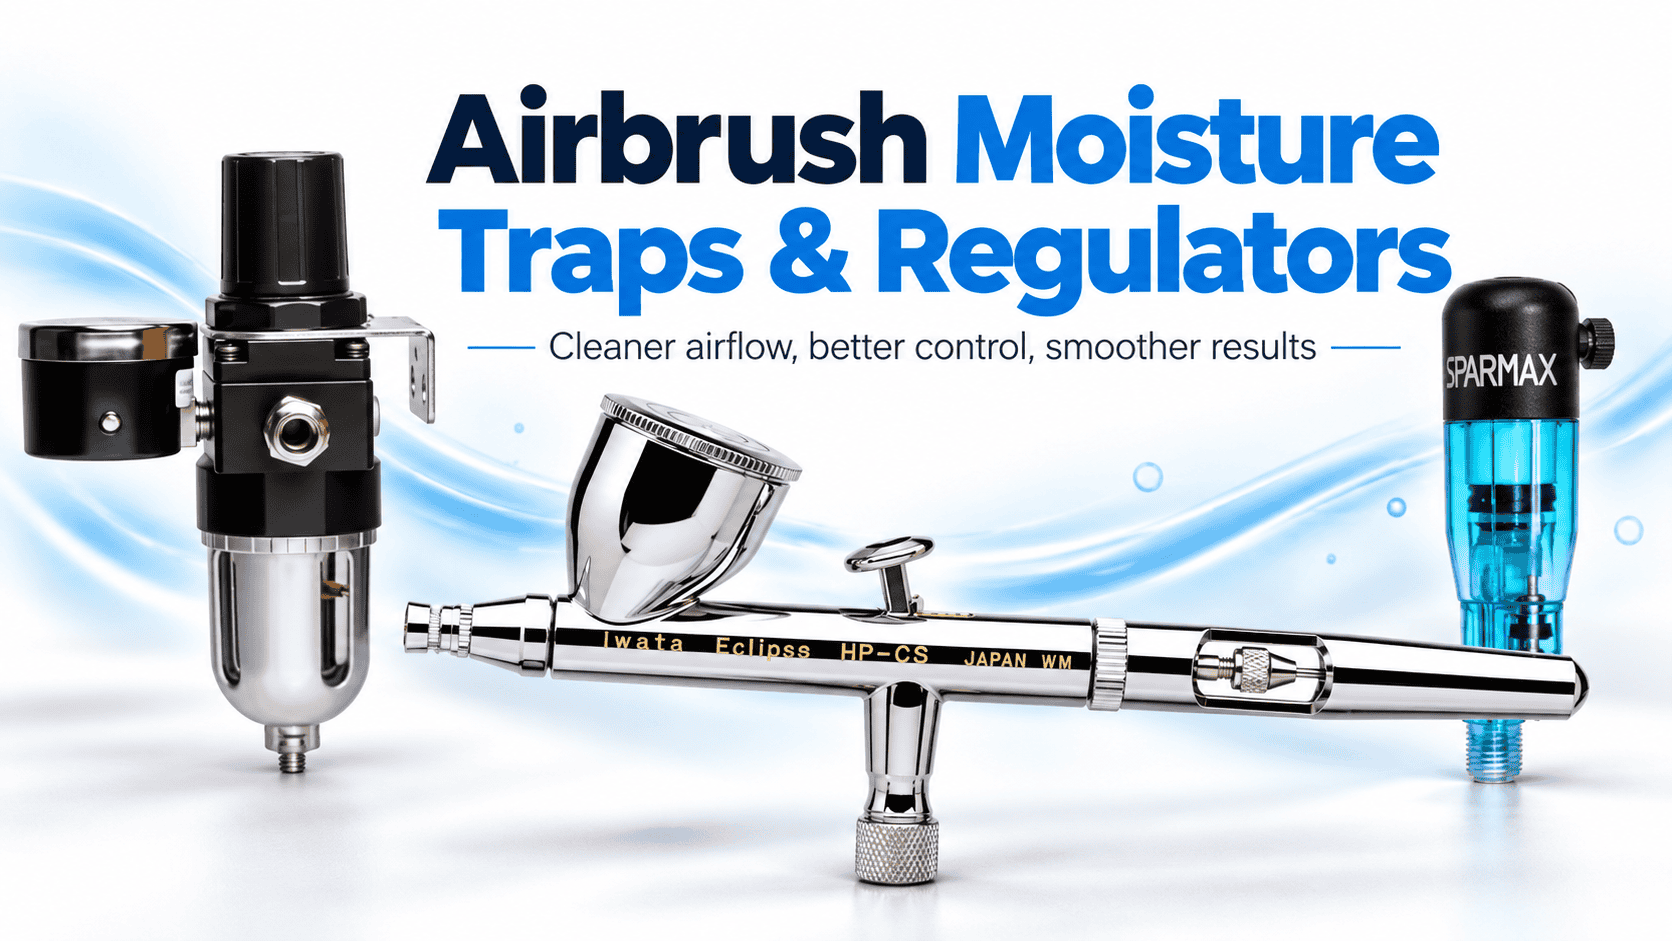
Airbrush Moisture Traps & Regulators Guide
Airbrush Moisture Traps and Regulators: The Complete Guide
Airbrush moisture traps and pressure regulators are two small accessories that can make a big difference to your spray results. They help control moisture, maintain suitable air pressure and improve spray consistency.
Whether you’re painting scale models, creating artwork or airbrushing miniatures, clean air and steady pressure are essential.
However, even a high-quality airbrush can struggle when moisture enters the airline or the pressure is incorrect.
Fortunately, the right accessories can help prevent these problems.
In this guide, we explain how airbrush moisture traps and regulators work. We also cover pressure settings, installation, maintenance and how to choose the right equipment.
What Is an Airbrush Moisture Trap?
An airbrush moisture trap, also known as a moisture filter or water separator, collects condensed water from compressed air before it reaches your airbrush.
When a compressor runs, it compresses the surrounding air. This process generates heat and can concentrate moisture within the air supply.
As the compressed air cools, water vapour may condense into liquid droplets.
Without a moisture trap, this water can travel through the airline and reach your airbrush.
As a result, you may notice sudden splattering, unexpected water droplets or uneven paint coverage.
Why Are Airbrush Moisture Traps Important?
Moisture in your compressed air can affect the quality of your finish.
For example, water droplets may disturb the paint as it leaves the nozzle. This can cause unexpected marks or spoil an otherwise smooth surface.
Common problems include:
- Random water droplets during spraying.
- Sudden splattering or inconsistent paint flow.
- Uneven paint coverage.
- Unwanted marks on freshly painted surfaces.
- Possible defects in moisture-sensitive coatings.
However, not every spray problem comes from moisture. Incorrect paint thinning, nozzle damage and unsuitable pressure can cause similar symptoms.
Therefore, check your entire setup before assuming the moisture trap is faulty.
Where Should You Fit an Airbrush Moisture Trap?
You can install airbrush moisture traps in several positions. However, two locations are particularly common.
1. At the Compressor
Many airbrush compressors include a moisture trap close to the air outlet.
This position allows the trap to collect condensed water before it enters the airline.
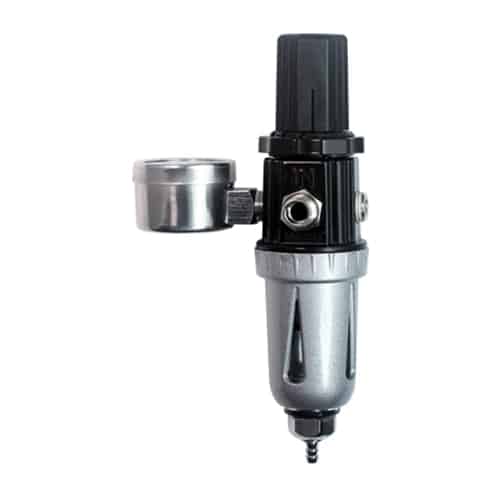
For example, an Iwata regulator and moisture filter combines pressure adjustment with moisture collection.
This arrangement offers a convenient way to manage both air quality and pressure.
However, moisture can still develop further along the airline as compressed air cools.
2. Near the Airbrush
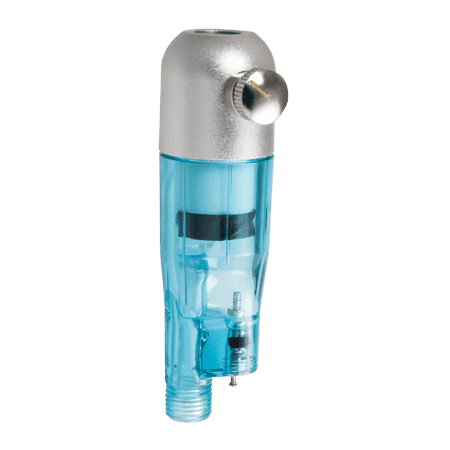
A small inline moisture trap fits between the air hose and the airbrush.
This location helps collect droplets that form or travel through the hose after the main compressor filter.
For example, the Sparmax Silver Bullet MAC moisture trap offers a compact option for controlling moisture close to the airbrush.
It also includes a micro air control valve for local airflow adjustment.
An inline trap can be particularly useful when:
- You spray for long periods.
- Your workspace has high humidity.
- You use a long air hose.
- Your compressor generates considerable heat.
- You notice water droplets despite having a compressor-mounted filter.
However, remember that a standard moisture trap mainly collects liquid water. It does not completely remove water vapour from compressed air.
Signs Your Airbrush Needs a Moisture Trap
Sometimes, a moisture problem is easy to identify.
At other times, it may look like an issue with the paint or airbrush.
Look for these common warning signs.
Sudden Water Droplets
If your airbrush releases unexpected droplets, moisture may have collected in the hose.
First, inspect the compressor’s moisture trap. Then, check whether any water has entered the airline.
Random Paint Splattering
Moisture can interrupt a smooth spray pattern and cause splattering.
However, a dirty nozzle or incorrect paint mixture can produce similar results.
Therefore, check the airbrush before replacing any equipment.
Problems During Long Spraying Sessions
Compressors can become warm during extended use.
As the compressed air cools, moisture may collect inside the hose.
Consequently, longer sessions can sometimes increase the need for effective moisture control.
Visible Water in the Filter Bowl
Many moisture traps have a clear collection bowl.
If water begins collecting inside, the trap is doing its job.
However, you should drain the bowl according to the manufacturer’s instructions.
What Is an Airbrush Pressure Regulator?
An airbrush pressure regulator controls the air pressure travelling from the compressor to the airbrush.
It allows you to adjust the pressure to suit your paint, airbrush and spraying technique.
Most regulators use an adjustment knob. Many also include a pressure gauge that displays the pressure in pounds per square inch (PSI) or bar.
Without suitable pressure control, the airbrush may receive more or less pressure than your work requires.
As a result, achieving a smooth and consistent finish can become difficult.
Why Is Air Pressure Important for Airbrushing?
Different airbrushing tasks require different pressure settings.
For example, fine detail work often benefits from lower pressure, particularly when using suitably thinned paint.
In contrast, thicker paints and broader coverage may require higher pressure.
However, no single pressure setting works for every airbrush.
Paint thickness, nozzle size, spraying distance and the type of finish all affect the pressure you need.
Therefore, treat recommended settings as a starting point and adjust them to suit your application.
What PSI Should You Use for Airbrushing?
The table below provides general starting points for common airbrushing tasks.
| Airbrushing task | Suggested starting pressure |
|---|---|
| Fine detail and thin paints | 10–15 PSI |
| General hobby airbrushing | 15–25 PSI |
| Primers and broader coverage | 25–35 PSI |
These figures are guidance rather than fixed limits.
Some airbrushes and paints need pressures outside these ranges. Always follow the manufacturer’s instructions where available.
For many general hobby applications, around 18–22 PSI can provide a useful starting point.
However, adjust the pressure until you achieve a smooth spray pattern.
How to Set Your Airbrush Pressure Correctly
Follow these simple steps:
- Connect your airbrush and hose to the compressor.
- Switch on the compressor.
- Press the airbrush trigger to allow air to flow.
- Adjust the regulator while air is flowing.
- Check the working pressure on the gauge.
- Test the spray pattern on a suitable surface.
- Make small adjustments until the spray looks consistent.
Importantly, check the pressure while air flows through the airbrush.
Otherwise, the gauge may show a higher static pressure rather than the actual working pressure.
What Happens When Airbrush Pressure Is Too High?
Excessive pressure can make an airbrush difficult to control.
For example, too much air can spread paint beyond the intended area. It can also push wet paint across the surface.
Common signs include:
- Excessive overspray.
- Spidering or paint spreading.
- Rough or uneven finishes.
- Greater paint waste.
- Difficulty producing fine details.
To correct these problems, reduce the pressure gradually.
Also, check your spraying distance and paint thickness.
What Happens When Airbrush Pressure Is Too Low?
Low pressure can also affect your results.
If the airbrush cannot atomise the paint properly, you may notice an uneven or grainy finish.
Common symptoms include:
- Sputtering.
- Poor paint atomisation.
- Uneven spray coverage.
- Grainy finishes.
- Difficulty spraying thicker paints.
However, low pressure is not always the cause.
A blocked nozzle, unsuitable paint mixture or limited compressor airflow can create similar problems.
Therefore, inspect your equipment before increasing the pressure.
Combined Airbrush Regulators and Moisture Traps
Many airbrush compressors use a combined regulator and moisture trap.
This arrangement offers two useful functions in one unit.
The moisture trap collects condensed water, while the regulator controls the air pressure.
For example, the Iwata Regulator and Moisture Filter includes a pressure gauge, adjustment control and moisture filter.
Combined units are particularly useful for beginners because they simplify the setup.
They also reduce the need for separate accessories.
A Typical Airbrush Compressor Setup
A common arrangement looks like this:
Compressor → Regulator and Moisture Trap → Air Hose → Optional Inline Moisture Trap → Airbrush
This setup gives you pressure control near the compressor and additional moisture protection close to the airbrush.
However, you may not need the extra inline trap if your existing system already supplies consistently dry air.
Tank vs Tankless Airbrush Compressors
Your compressor type can also affect air pressure and moisture control.
Both tank and tankless compressors have advantages. However, they deliver air differently.
Airbrush Compressors with Tanks
A tank compressor stores compressed air before sending it to the airbrush.
This stored air helps provide a steady supply and reduces the effect of pressure pulses from the compressor motor.
In addition, the compressor may switch off while you use the stored air.
However, water can collect inside the tank as the compressed air cools.
Therefore, follow the manufacturer’s tank-draining and maintenance instructions.
Tankless Airbrush Compressors
A tankless compressor supplies air directly without a separate storage tank.
These models often offer a compact and lightweight design.
However, some tankless compressors may produce more noticeable pressure pulses.
They may also run more frequently during longer sessions.
As a result, suitable pressure regulation and moisture control can be especially useful.
Nevertheless, performance varies between models. A well-designed tankless compressor can still provide excellent results.
You can explore GraphicAir’s range of airbrush compressors to compare different options.
How to Choose the Right Airbrush Moisture Trap and Regulator
Before buying accessories, check that they suit your compressor, hose and airbrush.
Here are five important features to consider.
1. Adjustable Pressure Control
Choose a regulator that allows smooth and accurate pressure adjustment.
This makes it easier to switch between detailed work and wider spraying tasks.
2. Clear Pressure Gauge
A visible pressure gauge helps you monitor your working pressure.
For example, you can quickly check whether your pressure matches the paint manufacturer’s recommendation.
3. Easy Moisture Drainage
Look for a moisture trap with an accessible drain valve.
This helps you remove collected water without unnecessary disassembly.
4. Suitable Hose Connections
Check the thread size and connection type before ordering.
Many hobby airbrush systems use 1/8-inch BSP fittings. However, some compressors and regulators use 1/4-inch BSP or other connections.
Therefore, you may need an adapter to connect the equipment correctly.
5. Good Build Quality
Choose reliable equipment from established manufacturers.
Good seals, suitable fittings and durable components help reduce air leaks and maintain consistent performance.
GraphicAir supplies a range of compressor spares and accessories, including regulators, moisture filters and fittings.
How to Maintain an Airbrush Moisture Trap
Regular maintenance helps your moisture trap work effectively.
Fortunately, most traps require only simple checks.
Drain Collected Water
Check the collection bowl regularly.
If water begins to build up, drain it according to the manufacturer’s instructions.
Never remove a pressurised filter bowl unless the manufacturer specifically provides a safe procedure.
Inspect the Filter
Some units contain replaceable filter elements.
Check the manufacturer’s maintenance guidance and replace these parts when necessary.
Check for Air Leaks
Inspect the hose connections and fittings.
Loose connections can reduce the pressure reaching your airbrush.
Therefore, use suitable seals or thread sealant where the fitting instructions require them.
Keep the Compressor Clean
Dust and dirt can affect compressor performance.
Clean the equipment according to the manufacturer’s instructions. Also, check the air intake filter where applicable.
Common Airbrush Problems and How to Fix Them
If your airbrush produces poor results, use this quick troubleshooting guide.
| Problem | Possible cause | What to check |
|---|---|---|
| Water droplets | Condensation in the airline | Drain the trap and inspect the hose |
| Paint splattering | Moisture, dirty nozzle or unsuitable paint mixture | Check moisture control and clean the airbrush |
| Excessive overspray | Pressure too high or incorrect technique | Reduce pressure and adjust spraying distance |
| Grainy finish | Poor atomisation or unsuitable paint mixture | Review pressure and paint thinning |
| Inconsistent airflow | Air leaks, pressure changes or compressor limitations | Check fittings, regulator and compressor |
| Weak spray | Low working pressure or blocked nozzle | Check the gauge, air supply and nozzle |
Remember that several faults can produce similar symptoms.
Therefore, change one setting at a time and test the result before making further adjustments.
Frequently Asked Questions
Do I need a moisture trap for my airbrush?
A moisture trap is a useful accessory for most compressed-air airbrushing setups.
It helps collect condensed water before it reaches the airbrush.
However, some compressors already include effective moisture control.
Therefore, check your existing equipment before buying another trap.
Can I use an airbrush without a pressure regulator?
Some compressors provide basic pressure control through other methods.
However, an adjustable regulator offers greater control over the working pressure.
This is particularly useful when switching between paints and spraying techniques.
Where should I fit an inline moisture trap?
Most small inline traps connect close to the airbrush handle.
This position helps collect moisture travelling through the hose.
However, always check the fitting size and follow the manufacturer’s instructions.
How often should I drain my moisture trap?
Check the trap regularly during use.
The amount of collected water depends on humidity, temperature, compressor performance and session length.
Drain the bowl whenever necessary and follow the manufacturer’s guidance.
Can I use two moisture traps?
Yes. Some users combine a compressor-mounted moisture trap with a small inline filter.
This can help collect water at different points in the air supply.
However, additional filters may create a small pressure drop, so make sure the setup meets your airbrush’s airflow needs.
What is the best PSI for beginners?
Around 18–22 PSI can be a useful starting point for many general hobby airbrushing tasks.
However, the best pressure depends on your airbrush, paint thickness and desired finish.
Start with the manufacturer’s recommendation where available, then make small adjustments.
Will a moisture trap stop all airbrush splattering?
No. A moisture trap helps prevent water-related splattering.
However, dirty nozzles, paint build-up, poor thinning and incorrect pressure can also affect your spray pattern.
Therefore, keep your airbrush clean and check the complete setup.
Conclusion: Why Airbrush Moisture Traps and Regulators Matter
Airbrush moisture traps and pressure regulators play an important role in achieving smooth, consistent spray results.
A moisture trap helps collect unwanted water from the compressed air.
Meanwhile, a regulator allows you to control the pressure reaching your airbrush.
Together, these accessories can reduce common spraying problems and give you greater control over your work.
For most hobby users, a compressor with a pressure regulator, gauge and moisture trap provides an excellent starting point.
Begin with a suitable pressure, test your spray pattern and make adjustments as needed.
Also, remember to drain your moisture trap regularly and maintain your compressor.
Find the Right Airbrush Accessories at GraphicAir
At GraphicAir, we offer airbrush compressors, moisture traps, regulators and accessories from leading manufacturers, including Iwata and Sparmax.
Whether you’re starting your first airbrushing project or improving an existing setup, the right equipment can make a real difference.
Explore our airbrush compressor accessories or browse our airbrush compressors.
Need help choosing a moisture trap or regulator? Contact GraphicAir for advice on finding the right accessories for your airbrushing setup.

