| Problem |
Cause |
Correction |
| Fluid is leaking from the packing nut |
- The packing nut is loose
- The Packing is worn or dry
|
- Tighten the packing, do not bind the needle
- Replace or lubricate the packing
|
| Air is leaking from the front of the gun |
- The air valve is sticking
- There is foreign matter on the air valve or seat
- The air valve or seat is worn or damaged
- The air valve spring is broken
- The valve stem is bent
- You have a damaged or missing air valve gasket
|
- Lubricate
- Clean
- Replace
- Replace
- Replace
- Replace
|
| There is fluid leaking or dripping from the front of the pressure feed gun |
- The packing is dry
- The packing nut is too tight
- The fluid tip or needle is worn or damaged
- There is foreign matter in the tip
- The fluid spring needle is broken
- You are using the wrong size needle or tip
|
- Lubricate
- adjust
- Replace the tip and needle with lapped set
- Clean
- Replace
- Replace
|
|
Jerky or fluttering spray
|
All Feed Systems
- The fluid tip or seat is damaged or loose
- The packing is dry or the fluid needle packing nut is loose
- The material level is too low
- The container is tipped too far
- There is an obstruction in the fluid passage
- The fluid tube or fluid inlet nipple is loose or broken
Suction feed only
- The material is too heavy
- The air vent is clogged
- The lid is damaged, loose or dirty
- The fluid tube is resting on the cup bottom
- The gasket behind the fluid tip is damaged
|
All Feed Systems
- Tighten or replace
- Lubricate or tighten packing nut
- Refill
- Hold more upright
- Back flush the feed system with solvent
- Tighten or replace the fluid tube or fluid inlet
Suction feed only
- Thin or reduce the material
- Clear the vent passage
- Tighten, replace or clean the coupling nut
- Tighten or shorten the fluid tube
- Replace the gasket
|
Top or bottom heavy spray pattern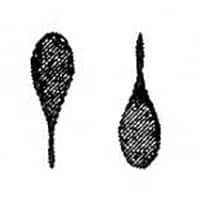 |
- The horn holes are plugged
- There is obstruction on the top or bottom of the fluid tip
- The cap and/or tip seat is dirty
|
- Clean with ream using non-metallic point (e.g. toothpick)
- Clean
- Clean with ream using non-metallic point (e.g. toothpick)
|
Right or Left heavy spray pattern |
- The horn holes are plugged
- Dirt on left or right side of fluid tip
|
- Clean with ream using non-metallic point (e.g. toothpick)
- Clean
*To remedy the top, bottom, right, left heavy patterns:
First determine if the obstruction is on the air cap or fluid tip. Do this by doing a solid test spray. Then, move the cap one-half turn and spray another pattern.
- If the fault is reversed, the obstruction is on the air cap. – Clean the cap as previously instructed.
- If the fault is not reversed, the clogged is on the fluid tip. – Check for a fine burr on the edge of the fluid tip. Remove it with #600 wet or dry sandpaper.
- Check for dried paint just inside the opening and remove it by washing with solvent
|
|
Right or Left heavy spray pattern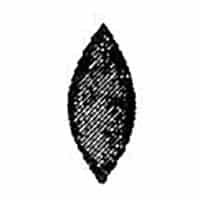
|
- Fluid pressure is too high for atomisation air (pressure feed)
- The material flow exceeds the air cap’s capacity
- The spreader adjustment valve is set too low
- The atomisation pressure is too low
- The material is too thick
|
- Balance air and fluid pressure. Increase spray pattern width
- Thin or reduce the fluid flow
- Adjust the valve
- Increase the pressure
- Thin the material to the correct consistency
|
|
Right or Left heavy spray pattern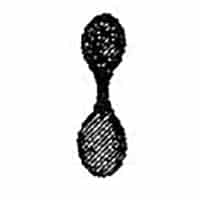
|
- Fluid adjustment knob is turn too far
- Atomisation air pressure is too high
- Fluid pressure is too low (pressure feed)
- The fluid tip you are using is too small
|
- Back out counter-clockwise to increase flow
- Reduce at the pressure at regulator
- Increase fluid pressure
- Use a larger size fluid tip
|
| Starved Spray Pattern |
- The material flow is inadequate
- The suction feed has low atomisation air pressure
|
- Back out the fluid adjusting screw to first thread or increase the fluid pressure
- Increase the air pressure and re-balance the gun
|
| Unable to form a round spray pattern |
- The fan adjustment stem is not seating properly
|
- Clean or replace
|
| Dry spray |
- The air pressure is too high
- The material is not properly reduced (suction feed problem)
- The gun is too far from the surface
- The gun motion is too fast
|
- Lower the air pressure
- Reduce the material to the correct consistency and temperature
- Adjust to the correct distance
- Slow down
|
| Excessive overspray |
- High atomisation air pressure
- The gun is too far from the surface
- You are using improper technique (e.g. arcing, or too fast gun speed)
|
- Reduce the air pressure
- Use the correct gun distance
- Slow the gun speed and keep the gun parallel to your work surface
|
| Excessive fog |
- Too much thinner or too fast drying thinner
- High atomisation air pressure
|
- Remix with correct reducer and at the right temperature
- Reduce the air pressure
|
| Not spraying |
- You’re using a pressure feed cap or tip with suction feed
- Gun has no pressure
- The fluid needle is not retracting
- The fluid needle is too heavy (suction feed problem)
|
- Use suction feed cap/tip
- Check the air lines
- Open the fluid adjusting screw
- Reduce the fluid viscosity or change the pressure feed
|
| Runs and sags |
- There’s too much material flow
- The material is too thin
- The gun is tilted at an angle
|
- Adjust the gun or reduce the fluid pressure
- Mix the material correctly or apply light coats
- Hold the gun at a right angle to work and adjust accordingly
|
| Thin, sandy coarse finish drying before it flows out |
- The spray gun is too far from the surface
- There is too much air pressure
- You are using the wrong thinner
|
- Check the distance. Generally, it’s 6 – 8″ for HVLP spray guns, and 8 – 10″ for conventional spray guns
- Reduce the air pressure and check the spray pattern
- Follow the paint manufacturer’s mixing instruction
|
| Thick, dimpled finish, like an ‘orange peel.’
Too much material coarsely atomised |
- The spray gun is too close to the surface
- The air pressure is too low
- You are using the wrong thinner
- The material is not correctly mixed
- Your work surface is rough, oily and/or dirty
|
- Check the distance. Generally, it’s 6 – 8″ for HVLP spray guns, and 8 – 10″ for conventional spray guns
- Increase the air pressure or reduce the fluid pressure
- Follow the paint manufacturer’s mixing instruction
- Follow the paint manufacturer’s mixing instruction
- Clean and prepare you work surface properly
|